Loss of Pay (LOP) on a payslip shows that the employee has lost pay for the number of days they have been off work. Following are the 3 parameters on which LOP gets impacted:
- When an employee raises an Unpaid Leave request
- In Tracking Policy, when the option ‘All penalties to be treated as Unpaid Leave (Loss of Pay). The deduction happens after … days of incident’ is enabled.
- LOP Overrides
1. When an employee raises Unpaid Leave request
Click on Me (1). Under Leave (2), find Apply Leave (3) and click on it.

Go to Leave Date (1) and then, choose from available Leave Types (2). Now, click on Request Leave (3). When an employee raises an unpaid leave like this, it will impact the LOP in the payroll.
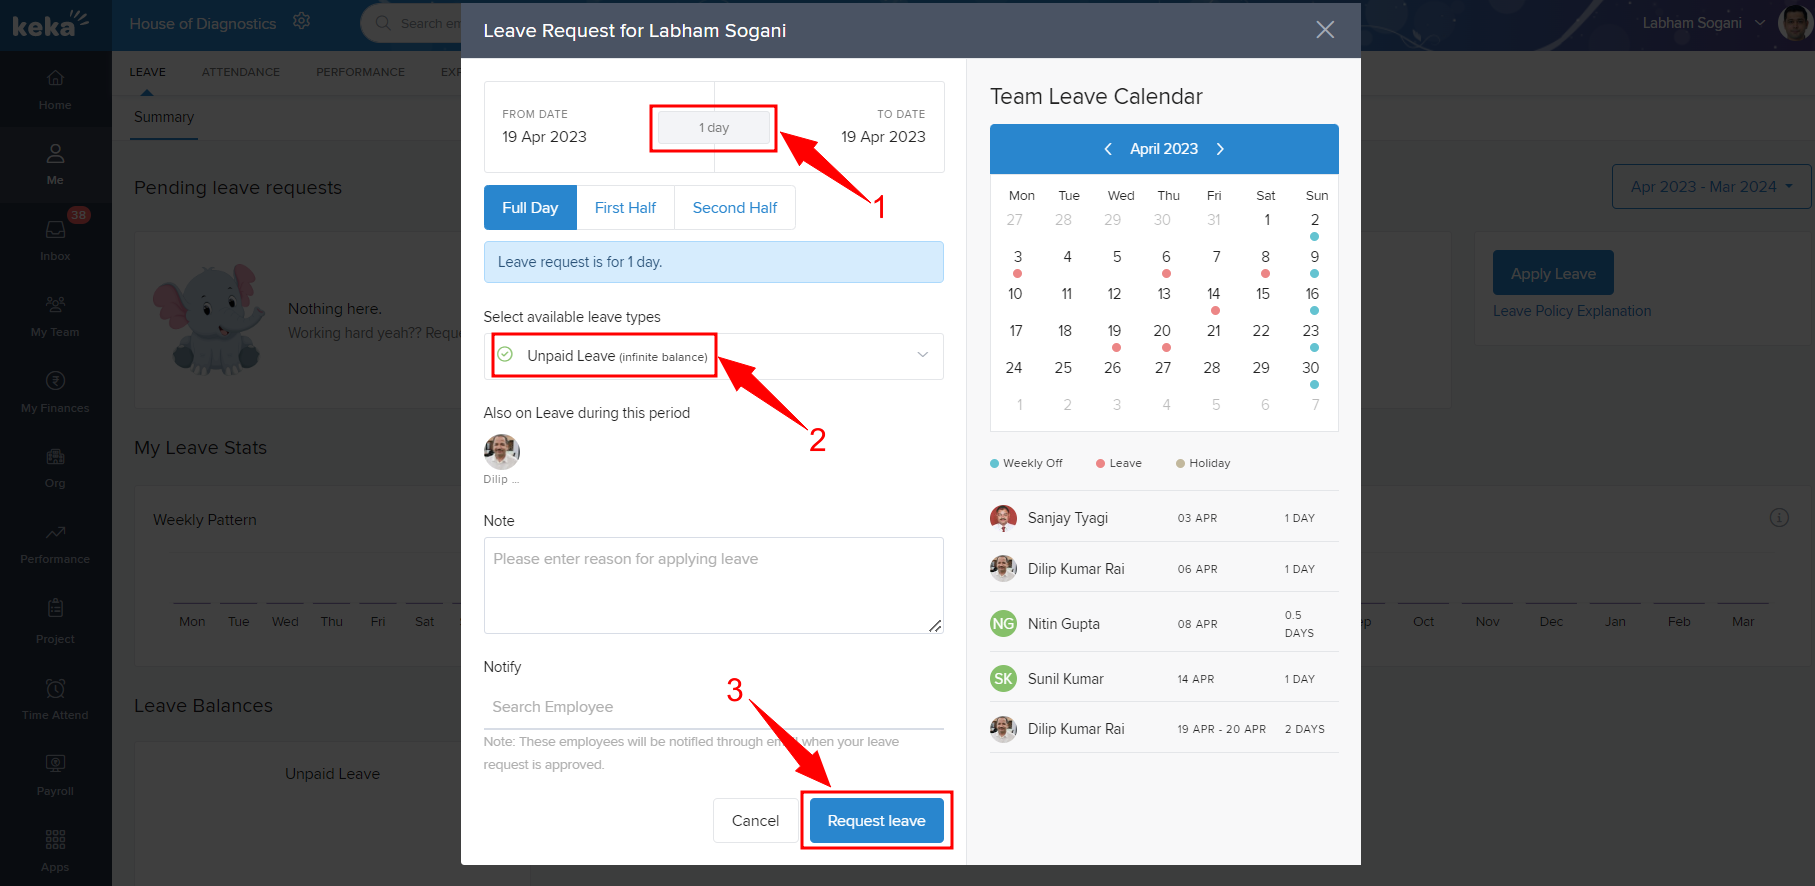
Note: An employee will only be able to request for unpaid leave if this leave type is included in the leave plan assigned to that employee.
2. In Tracking Policy, when we check the option ‘All penalties to be treated as Unpaid Leave (Loss of Pay). The deduction happens after … days of incident’.
Click on the Time Attend tab and go to Attendance Tracking. Click on Tracking Policy. After searching for the appropriate Tracking Policy (4), click on Versions (5) and then Edit (6).

In the tracking policy, in step 2 (No Attendance), look under the title 'How are Leave Deducted?'. You can see the option ‘All penalties to be treated as Unpaid Leave (Loss of Pay). The deduction happens after ... days of incident’ selected.

Similarly, in the Late Arrival, Work Hours, and Missing Swipes steps. you can check the 'How are Leave Deducted?' section and see if the option ‘All penalties to be treated as Unpaid Leave (Loss of Pay). The deduction happens after ... days of incident’ is selected or not.
3. LOP Overrides
Navigate to Payroll (1) and choose Run Payroll (2). Select your pay group (3). Go to Run payroll (4), use the drop-down menu and click on Leaves, Attendance & Daily Wages (5).

On the LOP Summary step, choose Add Employee or Import LOP Days. To add an employee to the list, use Add Employee and then search for the employees.

Under LOP Adjustment, update the number of days LOP is adjusted and click on Save & Continue.

For bulk upload (of more than 5 employees), use the Import LOP Days option.

When Import LOP Days is chosen, you will be prompted to download the Excel template.

The downloaded template will look like the following. Update all the details in the sheet and save it.
Note: The columns with red titles in the Excel template are mandatory fields.
Whatever LOP override we do in the Run Payroll will not appear in the employee leave history or in the consumed leave data or report.Once the Excel template is updated and saved, get back to the Import LOP days window on the portal. Upload the Excel File and proceed from there.

If you want to learn how to upload/download data using Excel files, click here.
It is hoped that this document helped you understand the various parameters on which LOP gets impacted. Please refer to the other articles too for any related queries. If need be, do contact us!
Was this article helpful?
That’s Great!
Thank you for your feedback
Sorry! We couldn't be helpful
Thank you for your feedback
Feedback sent
We appreciate your effort and will try to fix the article