Opportunities are the potential projects that your organization can take on for clients. They allow you to track and plan resource allocation, set timelines, assign win probabilities, and prioritize them. The opportunity creation process in Keka PSA allows you to log and manage sales or project opportunities effectively. This guide will walk you through the steps of creating opportunities and using the features to smoothly convert them into projects.
Logging an Opportunity
To begin logging an opportunity, access the left navigation pane and click on Project (1) and, select Opportunities (2). This will take you to the Opportunities List (3) tab.

On the Opportunities List page, under the Active section, click on the Add Opportunity button

Upon selecting the 'Add Opportunity' button, you will be presented with the 'Add Opportunity' window. In this window, you will need to complete the opportunity registration form by providing the necessary details. The form consists of several fields that require specific information.
First, you will need to enter a Name and Description (optional) for the opportunity under the Opportunity Name field. Next, select the relevant client or prospect associated with the opportunity from the provided options in the Client or Prospect field.
Specify the person responsible for managing the opportunity by filling in the 'Opportunity Manager' field. Set the start date for the opportunity in the 'Opportunity Start Date' field and the anticipated close date in the 'Tentative Opportunity Close Date' field.
Indicate the current stage of the opportunity by selecting the appropriate option in the 'Opportunity Stage' field. If applicable, include project-specific information such as Billing type, Estimated revenue, and Project duration.
Lastly, if there are any relevant documents like RFPs or client-related files, you can attach them using the 'Add Attachments' option.
Ensure that all the required fields are accurately filled out to ensure the proper registration of the opportunity. Then click on the Add button to log the opportunity successfully.

Once you select a client or prospect for an opportunity, it cannot be changed later on. It is crucial to ensure the accuracy of the client or prospect selection during the opportunity creation process. Furthermore, if a prospect is not yet registered in the system, you can conveniently register a new prospect instantly while creating the opportunity.
Bulk Importing Opportunities
Keka PSA also provides the option to bulk import opportunities, saving you time and effort. Follow these steps to import opportunities in bulk:
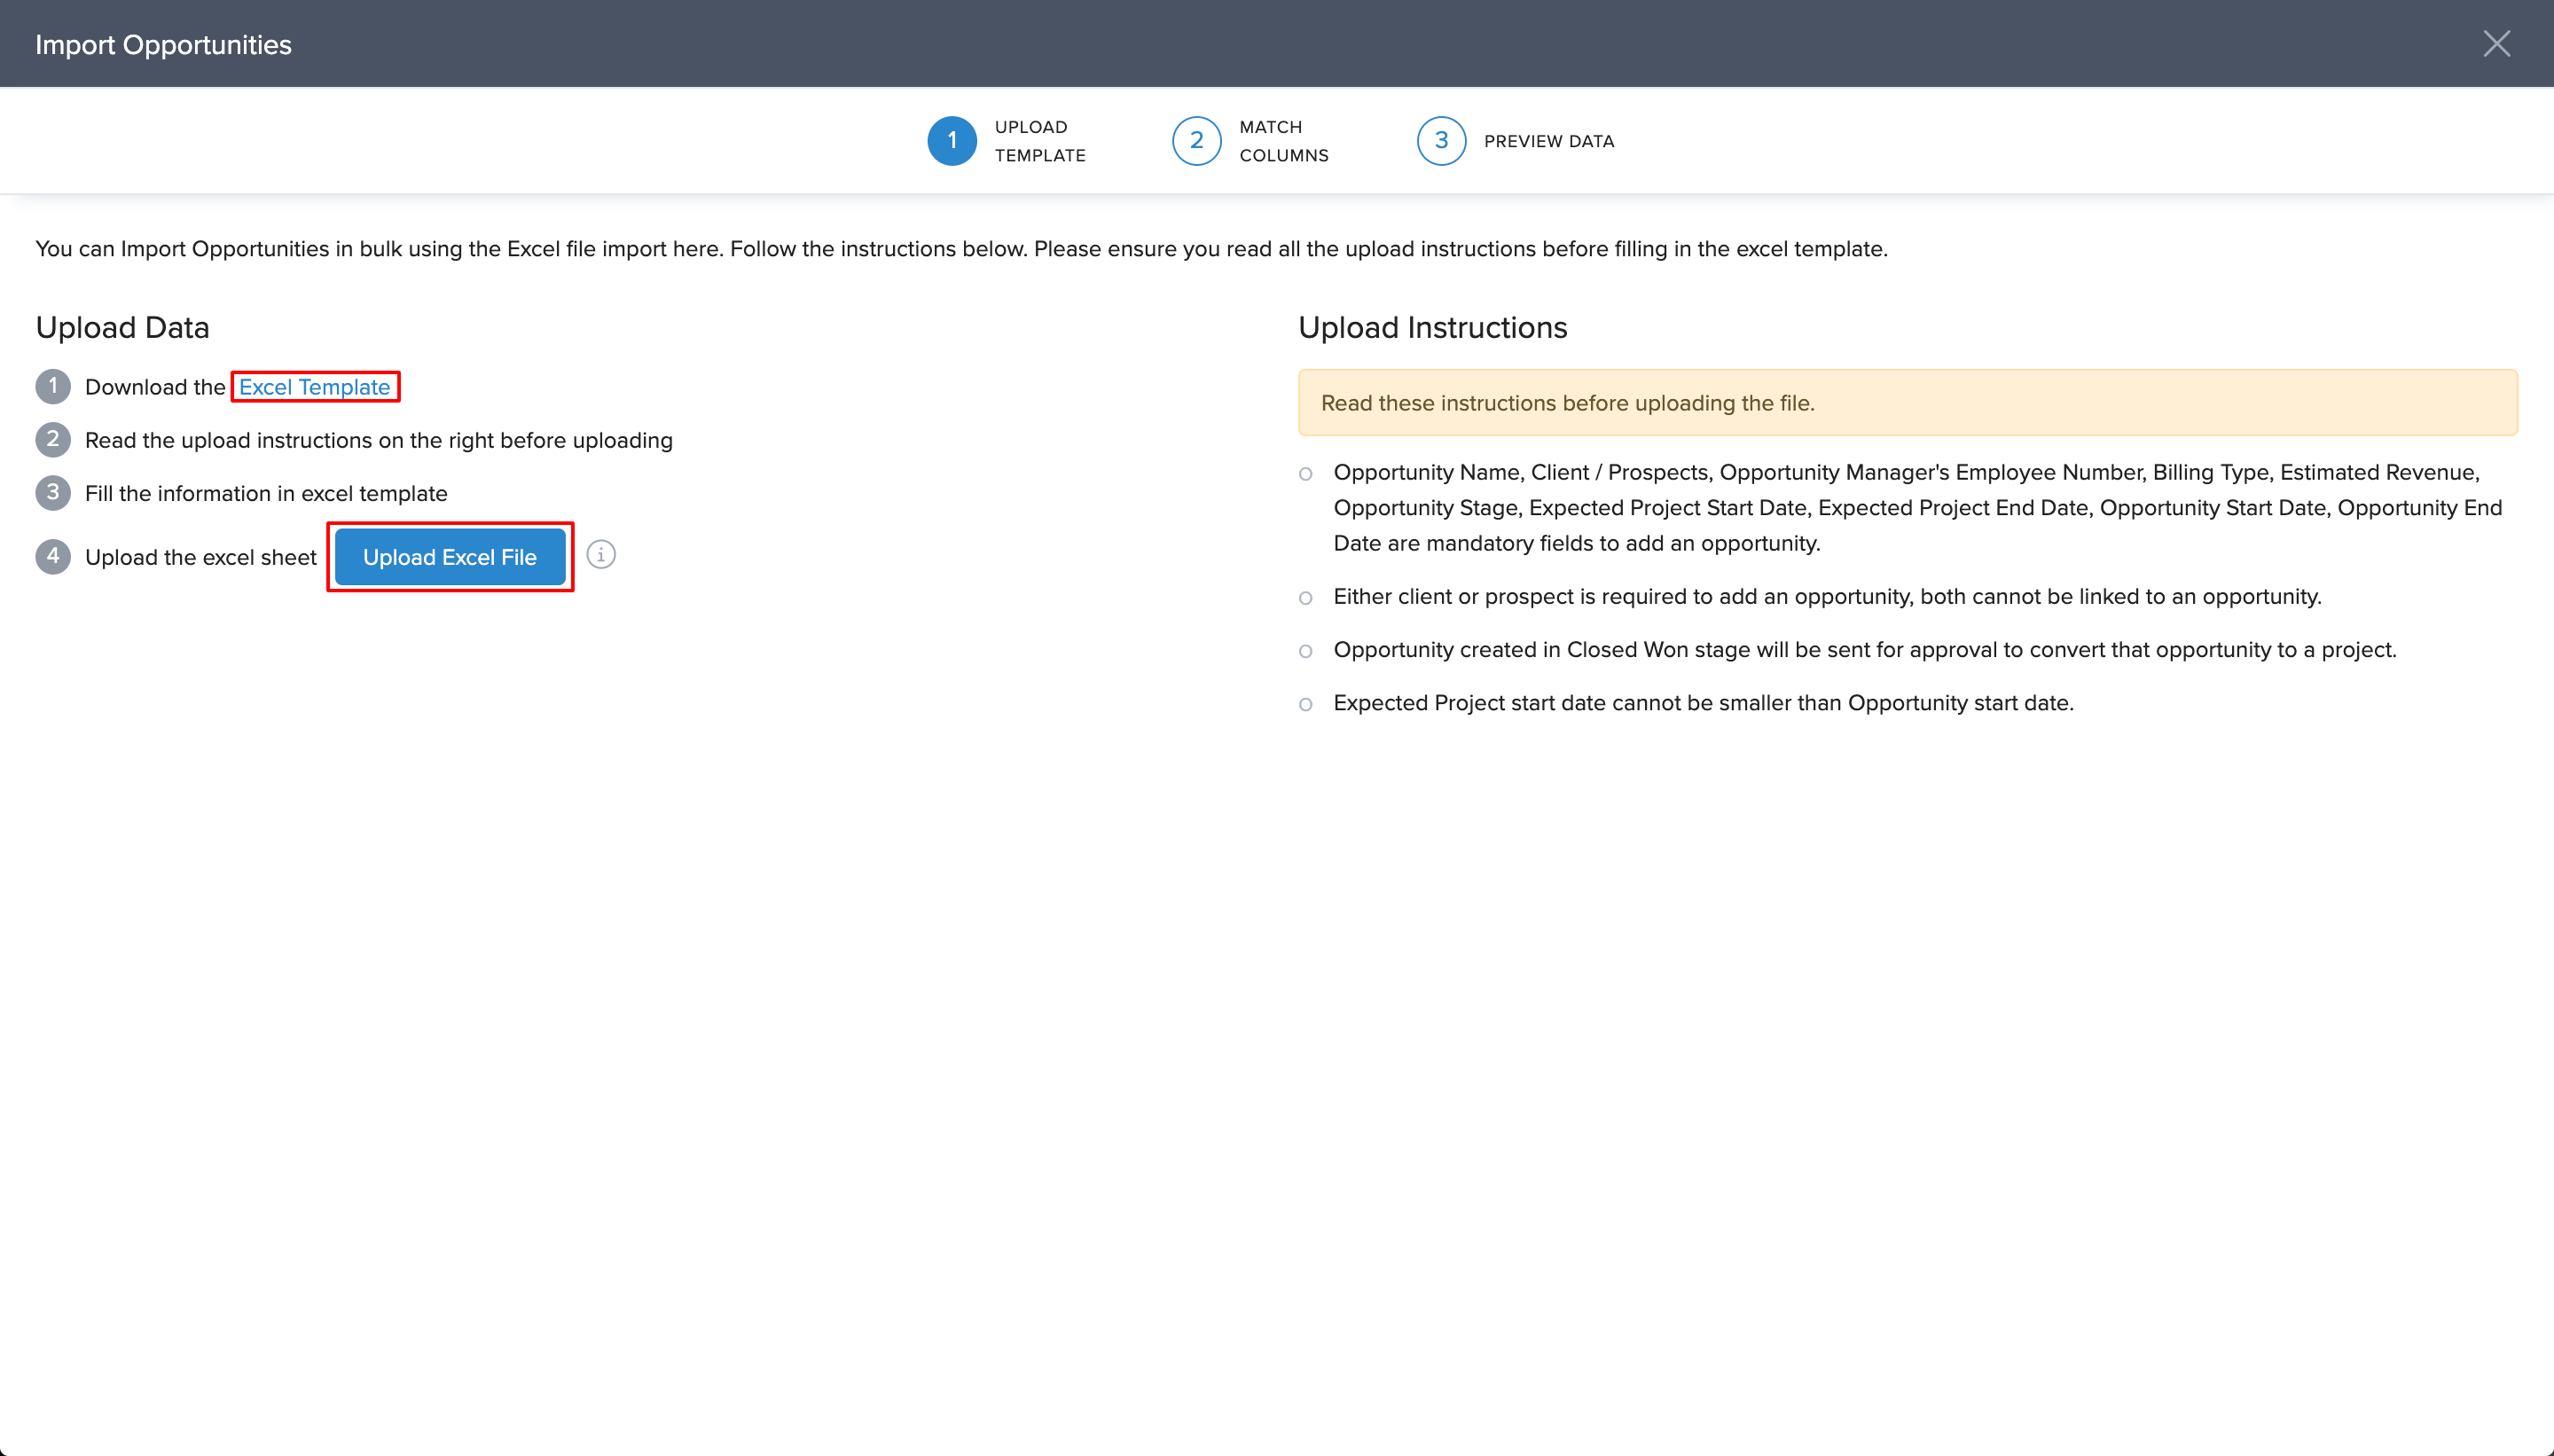
In the Opportunities List only and under the Active tab, click on the Bulk Import Opportunities option hidden under the +Add Opportunity button to initiate the import process.

Once you have filled all the required details in the sheet, save it and return to the Bulk Import Opportunities page and use the Upload Excel File button to upload it. Do read the Upload Instruction carefully in case of any confusion. To learn about this process in more detail, click here.
Opportunity List and Kanban View
All imported or registered opportunities will be displayed in the opportunity list under the "Active" section To gain a comprehensive view of your opportunities, Keka PSA offers two views: List view and Kanban view
Kanban view provides a visual and efficient method for managing and tracking tasks or projects. It offers a virtual board with cards representing individual tasks, which move across columns corresponding to different work stages. This approach enhances organization, task prioritization, and provides a comprehensive workflow overview.
This is what the list view will look like:

And this is how the Kanbam view will look like:

Creating a Prospect
In Keka PSA, prospects represent potential clients or organizations that can be converted into clients through projects. Adding prospects allows you to track potential clients and leads. Now, let's walk through the steps to create a prospect.
To begin, access the left navigation pane and click on Project (1) and, select Opportunities (2). Now open the Prospects (3) tab.
On the Prospects page, click on the Add Prospect (4) button to open the prospect registration form.
In the prospect registration form, please ensure to include the following essential details: the Prospect Name, the Country associated with the prospect, and the selection of the appropriate billing Currency for the prospect. These details are crucial for accurately recording and managing prospect information in our system.
Once you have entered the required details, click on the Add button to add the prospect.

Was this article helpful?
That’s Great!
Thank you for your feedback
Sorry! We couldn't be helpful
Thank you for your feedback
Feedback sent
We appreciate your effort and will try to fix the article